Most Android users don’t like using the default media player to look for an alternative. MX Player is the best media player for Android ever released so far. You can explore more helpful articles by visiting Brighter Guide. Read on to know how to fix MX Player No Audio Issue by Installing Custom Codec Files.
Obviously, it isn’t the perfect one you can opt for. Sometimes, MX Player acts strangely without delivering the sound. But, most probably, the error happens due to the absence of relevant codec packs. In this article, you will learn how to fix MX Player’s no audio issue by installing the necessary codec files in it.
Fix MX Player No Audio Issue Using MX Player Custom Codec
MX Player stopped supporting AC3 and DTS audio, and you need to install a custom codec to make the player compatible with such audio encoding format. For that, you have to go through two different stages of the process.
Stage 1: Understanding the Version You Need
There are multiple versions of the custom codec available for MX Player, and not everything will work for you. So, it is mandatory to know the codec your MX Player supports. Just follow the steps given below for that.
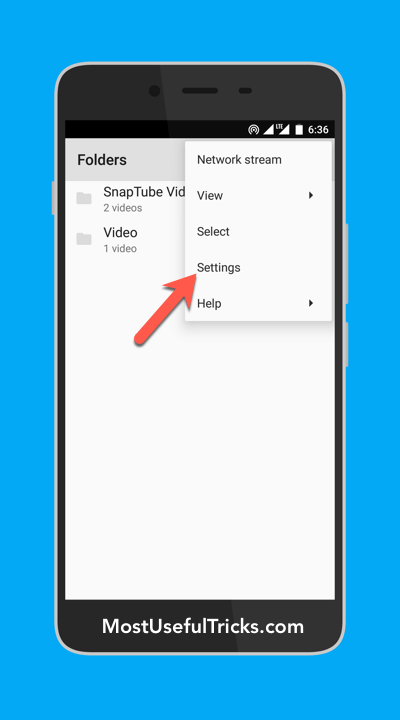
First, you have to open the MX Player. On the top-right corner of the app interface, you will see a three-dots button. Clicking on it reveals a new menu with multiple options. You need to select Settings from there.
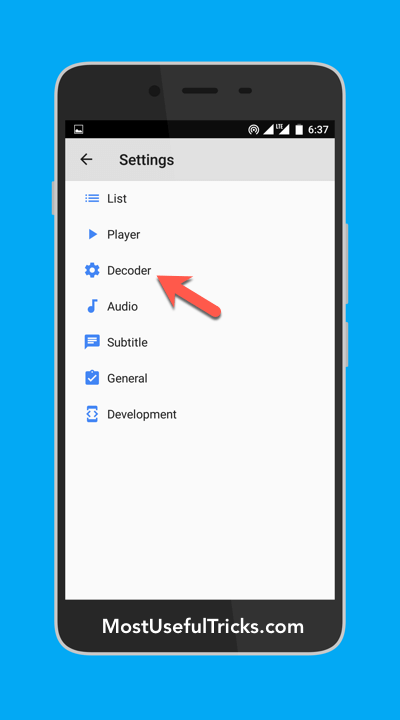
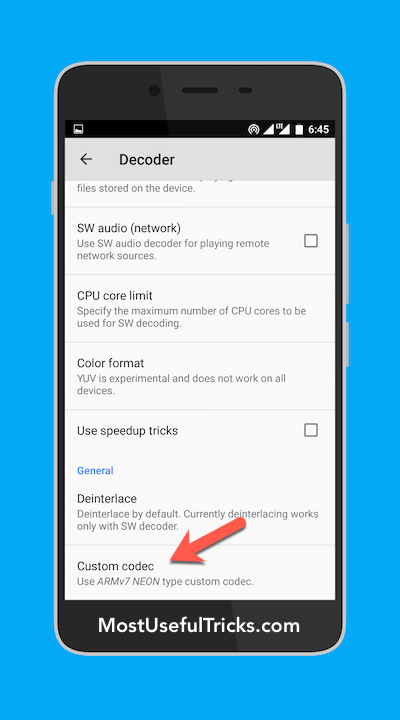
From the screen that pops up, the selection you must make is Decoder. Now, scroll down to the bottom, and there you will see the name of the custom codec you need to download. It can be ARMv7 Neon, x86, tegra2, tegra3, or neon.
Stage 2: Downloading and Installing Custom Codec
Now that you know which custom codec file you need, you must manually download it. Below we have shared the custom codec download link; you can visit the page and download the codec file you need. Of course, you must bear the version of your MX Player in mind while selecting the codec pack.
If you are not sure about what to do, you can go with the all-in-one codec pack present there. Are you downloading the zipped codec file using a computer? Then, transfer the same to your mobile phone after downloading it. Make sure you place it in the root directory of your internal storage.
Finally, follow the steps given below to install the custom codec on MX Player. This is just fast and easy.
- Step 1: First, you need to open the MX Player and hit the more button on the interface’s top-right corner.
- Step 2: From the menu that follows, choose Settings>> Encoder. You will see a scrollable screen with multiple options.
- Step 3: Scroll down to the bottom to see an option, Custom Codec. It will ask you for a codec file upon clicking the option. Just direct the wizard to the file you just stored into the internal storage.
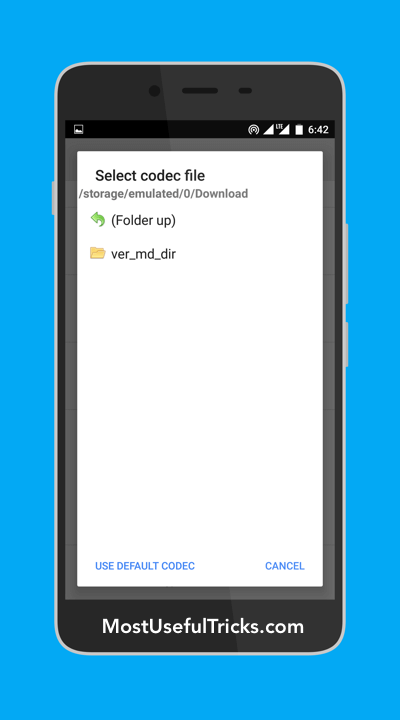
There you go! It won’t take much time to get everything set. Once the installation finishes, you will have to restart the MX Player for the functional working of AC3 and DTS audio.
Also, check other articles from our site on Download MX Player for PC Laptop Windows 7/8/8.1/10, How to Fix Unfortunately, Android Keyboard Has Stopped Error.
Conclusion
So, now you know how to install a custom codec to fix audio issues on MX Player, don’t you? As I told you earlier, you can go with the all-in-one codec pack if you face any confusion.
Ask us about custom codec version, corrupt codec message, compatible codec pack, direct codec file, custom codec pack, zip codec file, codec incompatibility issue, audio support video, decoder option, advanced option, audio codec, or anything from the article. Then, play your favorite video/video file in the video player in any video format or audio format you want.
Still, you have any doubts? Don’t forget to drop a comment below, and I will get back to you with a working solution. Thanks for reading!
All links for it is broken, i tried everywhere, somethint is wrong is mx files
fixed now – please check.